Mandrill (a.k.a Mailchimp Transactional Email) To Mailtrap:
A Migration Guide
This guide provides major highlights of how to migrate from Mandrill (now renamed to Mailchimp Transactional Email) to Mailtrap seamlessly: major differences, terminology comparisons, SMTP and API Configurations, and other tech specifications needed for the effortless switch.
Key Differences Between Mandrill and Mailtrap
- Depending on the pricing plan, Mailtrap stores emails in the Email Logs for up to 60 days. Email content and hard data is stored and accessible between 3 and 15 days without any additional fees.
- Mailtrap offers Email Testing. This is a separate product to inspect HTML/ CSS Spam Scores etc. and debug emails in staging, dev, and QA environments before sending them to recipients.
- Mailtrap supports and requires automatic validation of DMARC (together with SPF and DKIM).
- Mailtrap APIs accept and return JSON only. API requests do not accept HTTP POST parameters. Mailtrap doesn’t return API responses in XML and YAML formats.
- Mailtrap doesn’t support scheduled email sending.
- Mailtrap does not allow to automatically generate HTML content from Text email parts and vice versa. The content type has to be specified at the time of sending an email or creating a template.
Terminology comparison
- User Management
- Mailtrap Templates
- Suppressions
- Categories
- Webhooks
- Headers
- X-MT-Custom-Variables
- Users
- Templates
- Rejection Blacklist
- Tags
- Webhooks
- Headers
- X-MC-Metadata
General step-by-step migration flow
-
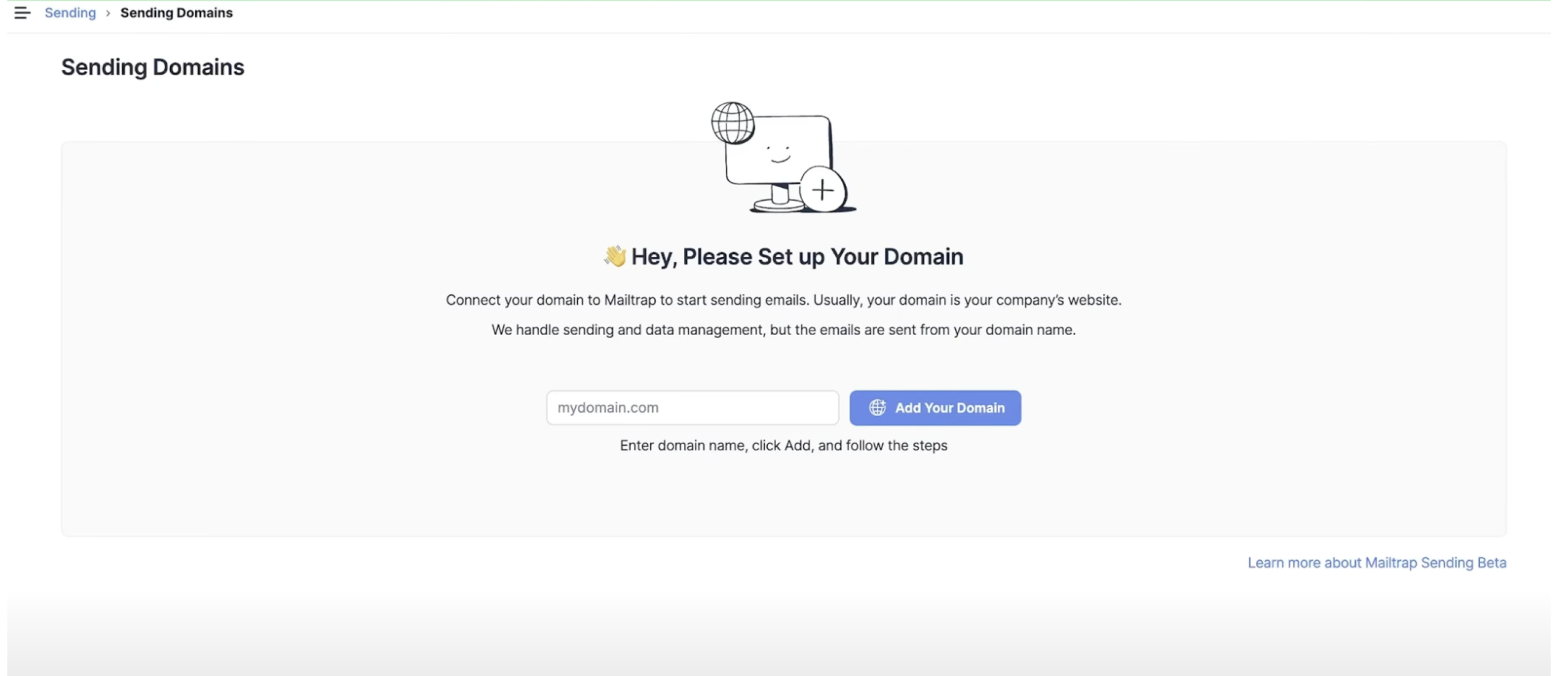
Sign up for Mailtrap, add your sending domain under Sending Domains and verify it. See our Getting Started Guide for more details.

-
If you use SMTP service, change your settings accordingly.
-
If you use API, check our libraries and API documentation.
-
Make sure you understand the key differences between Mandrill (Mailchimp Transactional) and Mailtrap mentioned above.
Need some help?
Contact our support and our tech experts will help you with it.

-
In case you plan to send more than 200k emails a month – contacting Mailtrap support is much recommended. We are also happy to help, just schedule a call with a member of our team and we’ll make sure your migration is done correctly.
Mailtrap Tip
You can use ActionMailer Balancer Ruby gem to proportionally distribute the email sending load between two different sending services (e.g. 70% Mandrill and 30% Mailtrap) to mitigate the sending risks.
Getting started
To start sending emails with Mailtrap, you only need to create an account, then register, and verify your domain. Domain setup and verification could be done either from the in-app Homepage, or from the Sending Domains tab under Sending.
Domain verification
- After you create an account and add your sending domain, it will take up to two business days to go through the security check.
- Make sure not to make any add-ons, fixes, and other alterations during the domain verification time since it could be seen as suspicious behavior.
- Until the domain is verified, the throughput of sending is limited to 100 emails per hour to prevent abusing the system with spam activities. Learn more about it in our Sending Limits article.
- The sending limits could be lifted by contacting the Mailtrap support team. In this case, you will have to provide answers to a number of questions to prove the trustworthiness and authority of your sending domain.
Sending with Mailtrap SMTP
SMTP Endpoints
Mandrill (Mailchimp Transactional) |
|
| live.smtp.mailtrap.io | smtp.mandrillapp.com |
SMTP Ports
| Port | Function | Mailtrap support | Sendgrid support |
| 587 | recommended for encrypted TLS SMTP connection | ||
| 25 | May be problematic due to blocking by some mailbox providers to avoid abuse | ||
| 2525 | For unencrypted/TLS | ||
| 465 | For SSL SMTP connection |
SMTP Configuration
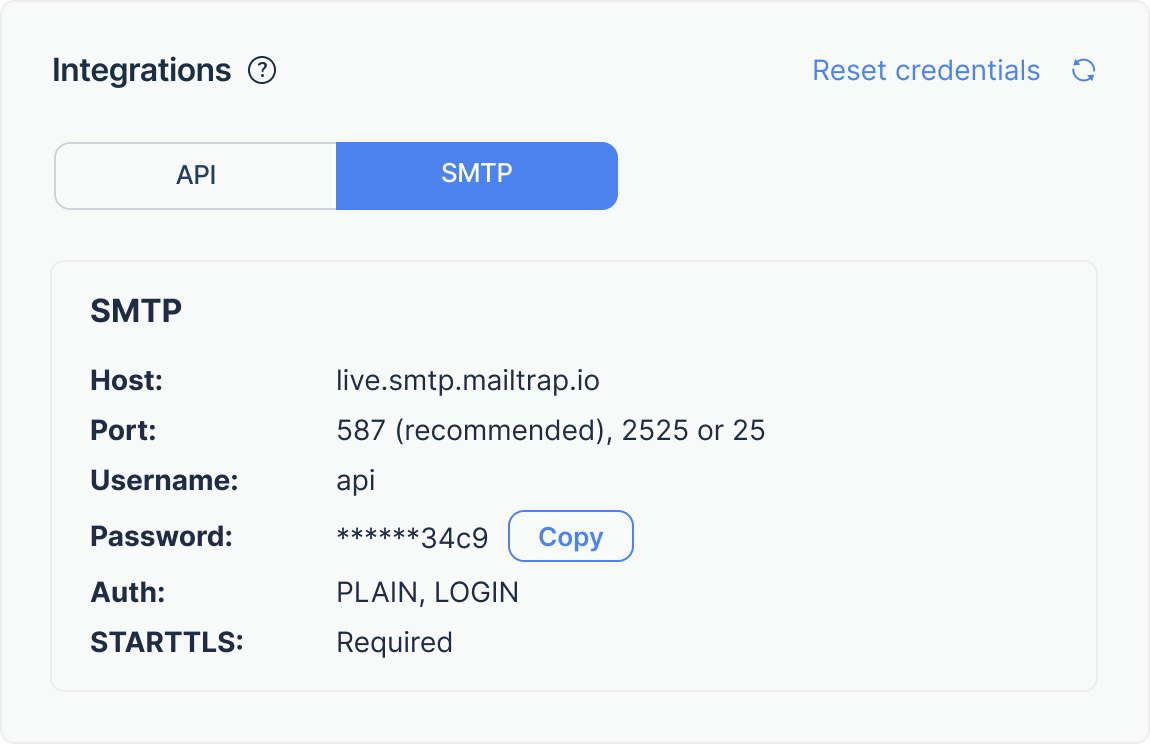
After signing up and verifying your sending domain go to the API and SMTP tab under Sending Domains. Select SMTP in Integrations.

Copy and paste the given SMTP credentials into your app.
Note: Turning TLS on is mandatory as mentioned in the credentials.
Sending with Mailtrap API
Mailtrap API tokens
When you create a domain, a token is automatically created and named based on the following formula: [domain name] + [token] + [token ID]. Add or remove token permissions by clicking on the corresponding boxes in the Token menu.
Learn more on how to manage API tokens in our guide.
API Mapping
| API type | Mailtrap | Mandrill (Mailchimp Transactional) |
| Email sending | Send email | Messages |
| User management | User management | Users |
| Email Testing | Sandbox API |
API Libraries
At the moment there are four libraries available at Mailtrap.
| Programming Language | Mailtrap | Mandrill (Mailchimp Transactional) |
| NodeJS | NodeJS SDK | NodeJS |
| Ruby | Ruby SDK | Ruby |
| PHP | PHP SDK | PHP |
| Python | Python SDK | Python |
API Authentication
Mailtrap uses Bearer authentication. So, you need to pass the API token under Authorization header of your email.
Permissions/User management
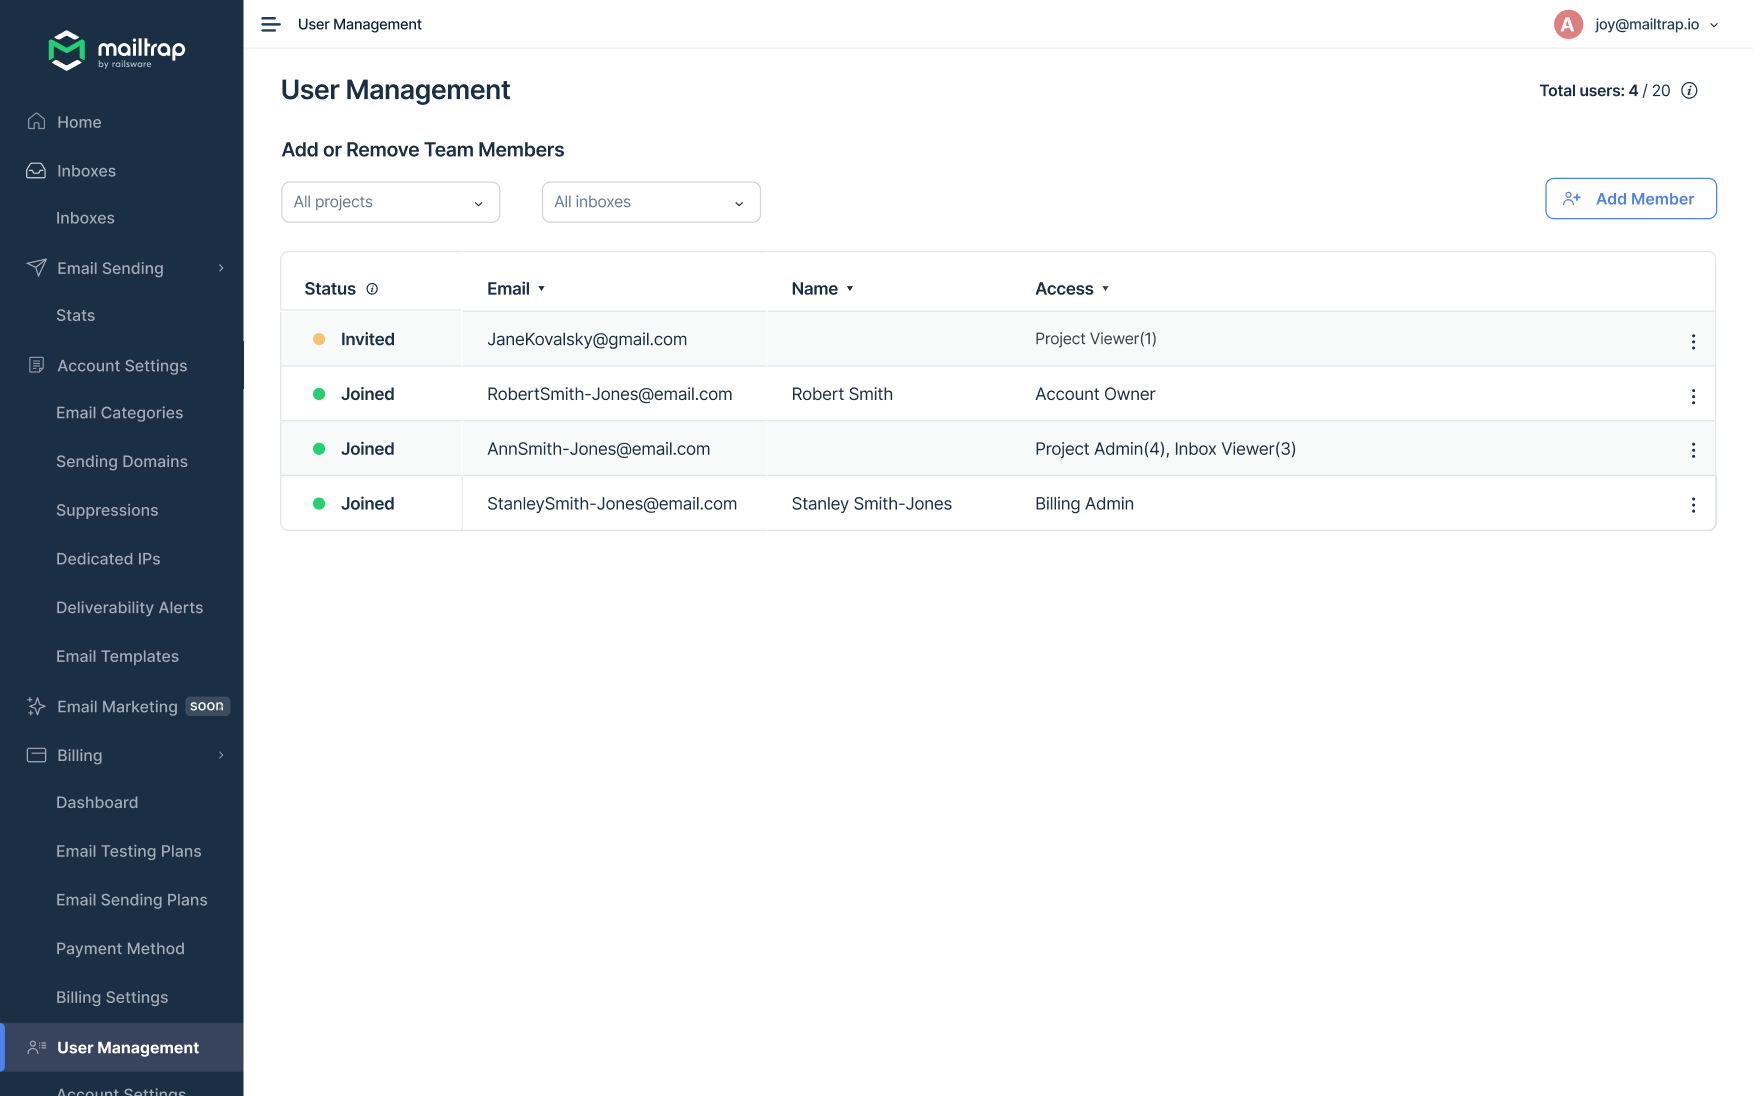
You can add users to your account and manage their permissions if you are signed up for the Business price plan or higher. To add users, and assign and edit their permissions, click on the User Management tab, and the three dots on the right.

Note that a user needs Admin permissions to get authenticated and send emails via API.
Read more about managing users permissions
ActionMailer Balancer for smooth migration
For Ruby on Rails applications, Mailtrap offers ActionMailer Balancer that makes the migration smooth.
ActionMailer extension allows proportionally distributing the email sending load between two different sending services and mitigating the sending risks.
After you install the Balancer to your application, and do some minor configurations, it will extend the sending method of ActionMailer.
For more detailed info on the boilerplate and use in development, read the Mailtrap ActionMailer Balancer Github page.