

Yagmail is a simple GMAIL/SMTP client that is created to remove the hassle out of sending emails. With the Python library, you can write a few lines of code to include email sending capabilities to your application and sidestep using the cumbersome traditional approaches. In this tutorial, we’re going to demonstrate how to use Yagmail for sending emails.
So, let’s get started….
Project Setup
Let’s begin by setting up the following requirements for this Yagmail in Python tutorial:
- Gmail account: Since Yagmail is designed to interact with Gmail accounts, we’ll set up an account for this project. Next, on the account’s security settings, we’ll turn on the Allow less secure apps option—this will allow our app to interact with Gmail without any issues. Note that this makes your account vulnerable to unauthorized access. So, if you want to enforce the security of your Gmail account, you can use the OAuth2 authorization framework to get the access rights.
- Yagmail: For setting up Yagmail on our development environment, we’ll simply run the following command:
pip install yagmailThen, we’re ready to go!
How to Send an Email with Yagmail
Here is the code for sending an email using Yagmail:
#importing the Yagmail library
import yagmail
try:
#initializing the server connection
yag = yagmail.SMTP(user='my_username@gmail.com', password='mypassword')
#sending the email
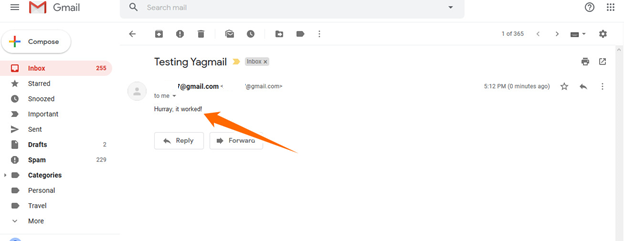
yag.send(to='recipient_username@gmail.com', subject='Testing Yagmail', contents='Hurray, it worked!')
print("Email sent successfully")
except:
print("Error, email was not sent")It’s that simple!
Let’s explain what is happening in the code above:
- We started by importing the Yagmail Python library into our project.
- We created a yagmail.SMTP instance to initialize the server connection.
- For authentication, we specified the address and the password of the Gmail account we created. A safer way of implementing authentication is to use OAuth2 credentials, as the rights of tokens can easily be revoked. It can be done by simply passing the oauth2_file to yagmail.SMTP.
Here is an example:
yag = yagmail.SMTP("my_username@gmail.com", oauth2_file="~/oauth2_creds.json")- Finally, we invoked the Yagmail’s send() function to specify the details of our email message. Although the parameters of the function are optional, we used the three keyword arguments to specify the recipient’s email address, the email’s subject, and the email’s body, respectively.
- We also wrapped the entire code in a try…except block to handle any errors, such as a wrong password.
If we run the code and check our Gmail account, we find the message in the inbox:

That’s the simple way for Yagmail usage in sending emails.
Sending Email with Multiple Attachments in Yagmail
To send an email with an attachment in Yagmail, simply specify the attachments keyword argument as a parameter in the send() function and provide the attachment’s absolute path.
Here is an example:
#importing the Yagmail library
import yagmail

try:
    #initializing the server connection
    yag = yagmail.SMTP(user=''my_username@gmail.com', password='password')
    #sending the email
    yag.send(to=' recipient_username@gmail.com', subject='Sending Attachment', contents='Please find the image attached', attachments='Desktop/File 1/image1.png')
    print("Email sent successfully")
except:
    print("Error, email was not sent")
If we run the code and check our Gmail account, we find the attachment in the inbox:


To send an email with multiple attachments, simply pass a list of the attachments to the attachments argument.
Here is an example:
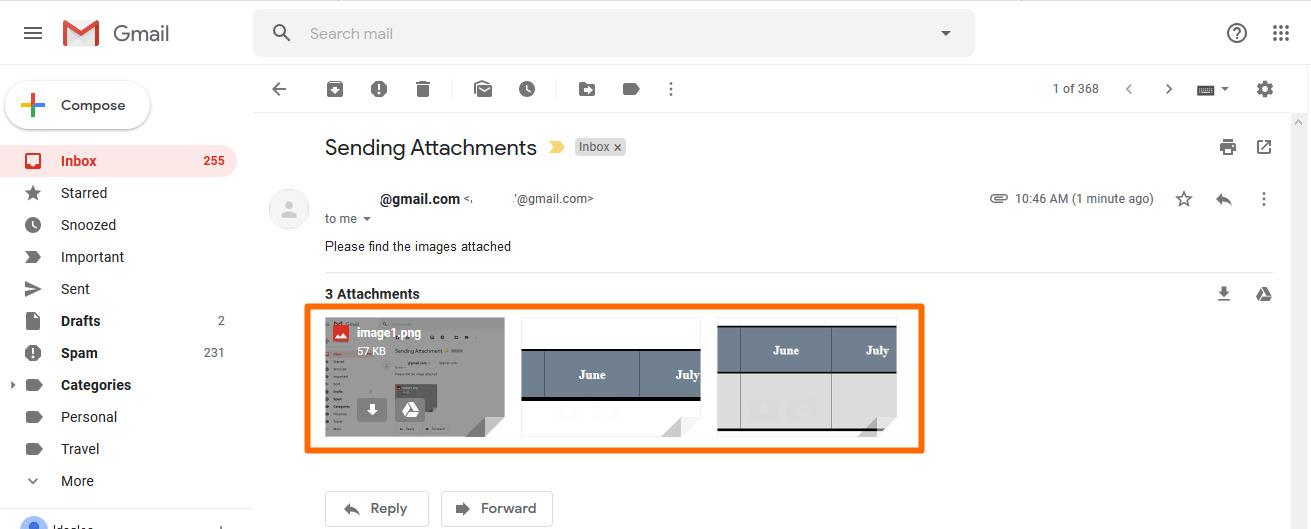
yag.send(to='user1@gmail.com', subject='Sending Attachments', contents='Please find the images attached', attachments=['Desktop/File 1/image1.png','Desktop/File 1/gantt2.png','Desktop/File 1/gantt3.png'])If we check our Gmail account, we find the attachments:

Sending Emails to Multiple Recipients
Yagmail in Python makes it easy to send an email to a group of people. To do that, simply pass a list of email addresses to the to argument.
Here is an example:
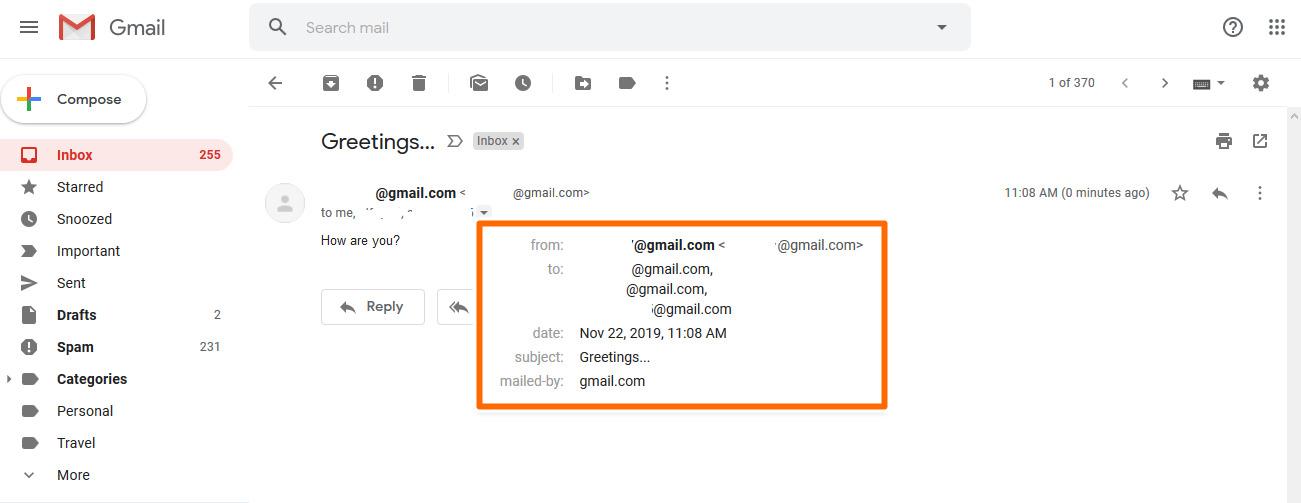
yag.send(to=['user1@gmail.com', 'user2@gmail.com', 'user3@gmail.com'], subject='Greetings...', contents='How are you?')Here is the output:

Sending Emails with CC and BCC Fields
To send an email with CC (carbon Copy) field and BCC (Blind Carbon Copy) field, simply specify cc and bcc keyword arguments as parameters in the send() function.
Here is a Yagmail usage example:
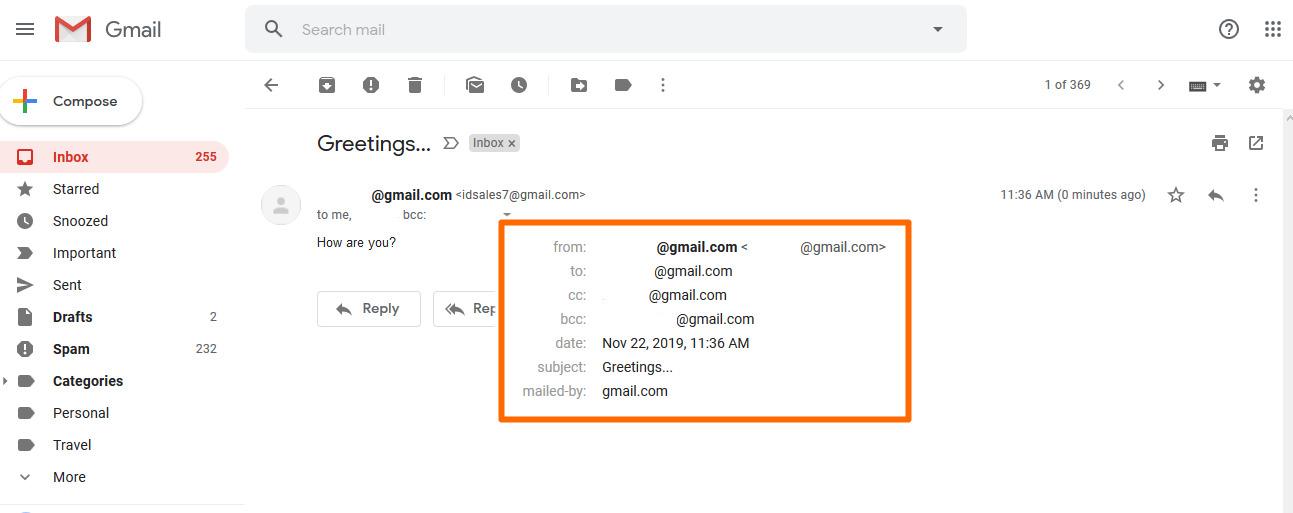
yag.send(to='user1@gmail.com', cc='user2@gmail.com', bcc='user3@gmail.com', subject='Greetings...', contents='How are you?')Let’s see the results in our Gmail inbox:

How to Send an HTML Email
Furthermore, setting up Yagmail to send an HTML email message is easy; in the contents argument of Yagmail’s send() function, we can pass a valid HTML and the message will be formatted according to the provided HTML syntax.
Here is an example:
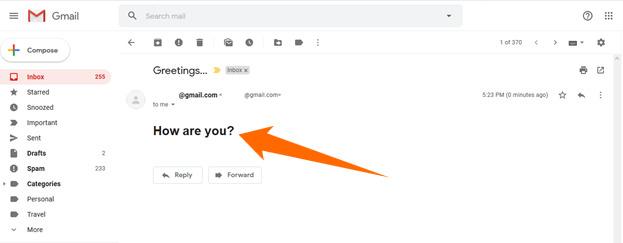
yag.send(to='user1@gmail.com', subject='Greetings...', contents='<h1>How are you?</h1>')Here is how the message appears in our Gmail inbox:

How to Test Emails with Mailtrap and Yagmail
If you want to send messages using Yagmail, you can use Mailtrap to test and debug your Gmail email samples before broadcasting them. This way, you’ll protect your reputation and avoid spamming your real customers by mistake.
Here is the code for testing emails with Mailtrap and Yagmail:
#importing the Yagmail library
import yagmail

try:
 #initializing the server connection
  yag = yagmail.SMTP(
  #required to bypass email format validation
  user={'INSERT MAILTRAP USERNAME':''}, #Mailtrap username
  soft_email_validation=False,
  password='INSERT MAILTRAP PASSWORD', #Mailtrap password
  host='smtp.mailtrap.io',
  smtp_starttls=True,
  smtp_ssl=False
 )
 #sending the email
 yag.send(to='user1@gmail.com', subject='Mailtrap and Yagmail', contents='The testing worked!')
 print("Email sent successfully")
except:
 print("Error, email was not sent")
Then, if we run the code above and open our Mailtrap inbox, we can see that the email is trapped there.


Consequently, we’ve verified that if we use Yagmail in Python to send the email message, everything will be working properly.
Besides, we can use Mailtrap to make adjustments to the email content and see how it will appear in users’ inboxes, without spamming them with error messages.
Click here to read more on how to use Mailtrap for testing emails.
Wrapping Up
Gmail is a versatile email service that is widely used across the world. With Yagmail, you can simplify the tasks of sending emails to Gmail users and take the functionalities of your application to the next level.
Of course, in this tutorial, we just scratched the surface about what is possible with Yagmail usage. If you want to see more usage examples, you can check its documentation.
Enjoy using Yagmail to send emails, and remember: always test your emails to avoid embarrassments!