Skip to Navigation
Flask is a popular Python web framework and the preferred choice for many web developers. It’s often referred to as a microframework because of its limited capabilities and the general minimalist approach to developing in Python. As such, it also doesn’t offer a native solution for sending emails, but more than makes up for it with an excellent Flask-Mail extension.
In this article, we’ll explain how to configure and send emails with Flask-Mail. We’ll discuss various options for sending and testing Flask emails, both individually and in bulk. We’ll touch on a number of other configuration options, so bear with us.
Why send emails from Flask?
Sending emails is a vital part of many Flask applications. When users create an account, a confirmation email should hit their inboxes right away. When they forget their password, a handy mechanism for resetting it built into an app will make their life a lot easier. As things stand in 2021, this process almost always relies on email too.
There are many, many other situations when an auto-generated email is a must. Luckily, it’s really easy to set things up and send the first emails within minutes. Flask-Mail is our preferred choice for this tutorial.
It’s built on top of the popular Python’s smtplib module, which it enhances in a number of ways. It provides a simple-to-use interface and makes it easy to send bulk emails, attachments, and configure a number of other settings with ease.
If you prefer, you can still send emails with smtplib, but for more on that, we invite you to read our more general article on sending emails in Python.
Getting started with Flask-Mail
To get started, we’ll need to take care of a few brief installs, traditionally done with a pip. If you don’t have Flask installed yet, add it right away:
pip install FlaskTo install Flask-Mail, use the following:
pip install Flask-MailAdding and configuring virtualenv [optional]
It’s not required, but if you wish to isolate this environment, consider adding virtualenv to the mix. You’ll also do this with a pip:
pip install virtualenvThen, launch the terminal and head to the folder you’ll use for this project. Type in the following:
On MacOS or Linux:
python3 -m venv your_nameOn Windows:
py -m venv your_nameReplace ‘your_name’ with whatever you want to name the environment, and then activate it:
On MacOS or Linux:
source your_name/bin/activateOn Windows:
.\your_name\Scripts\activateConfiguring Flask-Mail
Now we’ll need to do some basic configuration – decide how we’re going to send emails using Flask, insert our credentials, pick the encryption or choose to send without it, etc.
As we don’t really want to email the customers just yet, we’ll capture all test emails with Mailtrap. It’s a fake SMTP environment that can be easily plugged into a Flask app. This way, you can mimic sending, but actually receive all emails into a virtual Mailtrap inbox.

But if you don’t mind connecting an ESP (Sendgrid, Mailgun, etc.), or want to try Gmail, for example, you can use the respective credentials too. Here are the available options:
MAIL_SERVER : default 'localhost'
MAIL_PORT : default 25
MAIL_USE_TLS : default False
MAIL_USE_SSL : default False
MAIL_DEBUG : default app.debug
MAIL_USERNAME : default None
MAIL_PASSWORD : default None
MAIL_DEFAULT_SENDER : default None
MAIL_MAX_EMAILS : default None
MAIL_SUPPRESS_SEND : default app.testing
MAIL_ASCII_ATTACHMENTS : default False
If you were to use Mailtrap, you would find the simplified configuration in your inbox’s settings, for example:
app.config['MAIL_SERVER']='smtp.mailtrap.io'
app.config['MAIL_PORT'] = 2525
app.config['MAIL_USERNAME'] = '97e041d5e367c7'
app.config['MAIL_PASSWORD'] = 'cfaf5b99f8bafb'
app.config['MAIL_USE_TLS'] = True
app.config['MAIL_USE_SSL'] = False
When moving to a production environment, it’s probably a good idea not to hardcode the credentials in the code. Instead, store them in the environment variables and quickly update them without rewriting the code, like this:
app.config['MAIL_USERNAME'] = os.environ.get('MAIL_USERNAME')
app.config['MAIL_PASSWORD'] = os.environ.get('MAIL_PASSWORD')
Sending via Gmail
Gmail can be an appealing option if you’re on a budget. If it doesn’t work for you, but you have a rather small volume, there are quite a few other options to get a free SMTP server for your app.
Sending via Gmail is popular because virtually everyone has a Gmail account. If you’re one of them, you can send up to 100 emails for free per each rolling 24 hours. Upgrading to one of the paid plans will give you a much higher capacity.
To use your Gmail account to send emails with Flask, you’ll simply need to change a few details in the code we used for Mailtrap:
app.config['MAIL_SERVER']='smtp.gmail.com'
app.config['MAIL_PORT'] = 465
app.config['MAIL_USERNAME'] = 'your_email@gmail.com'
app.config['MAIL_PASSWORD'] = 'your_password'
app.config['MAIL_USE_TLS'] = False
app.config['MAIL_USE_SSL'] = True
Chances are that that’s all you’ll have to do. Most likely though, you’ll need to make a few tweaks to send any emails via Gmail:
- Allow less secure apps
By default, Google blocks connections from applications it deems insecure. Yours is very probably one of them, but it’s nothing to be afraid of – nearly all newly connected apps fall into this category.
It’s easy to fix. Head over to your list of less secure apps and toggle on “allow less secure apps”.
- Make sure no 2FA is set
If you have 2-factor authentication enabled on your account, you also won’t be able to send any messages using Flask-Mail and Gmail. You’ll see an alert about it under the link above if this applies to you.
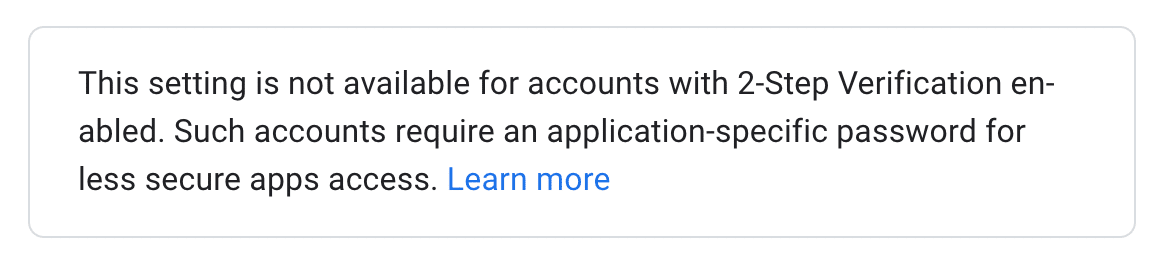
If you use a given email address for something more than emailing from Flask, we would highly encourage you not to disable 2FA at this point. Instead, consider creating a new Gmail account just for the purpose of this app. Or, better yet, set up an application-specific password.
Sending emails in Flask
Email sending in Flask-Mail is handled by an instance of a Mail class.
from flask import Flask
from flask_mail import Mail

app = Flask(app_name) # pick the name
mail = Mail(app)
We’ll need to set up a Message object, mapped by the URL rule (‘/’), and insert the base details of our message:
@app.route("/")
def index():
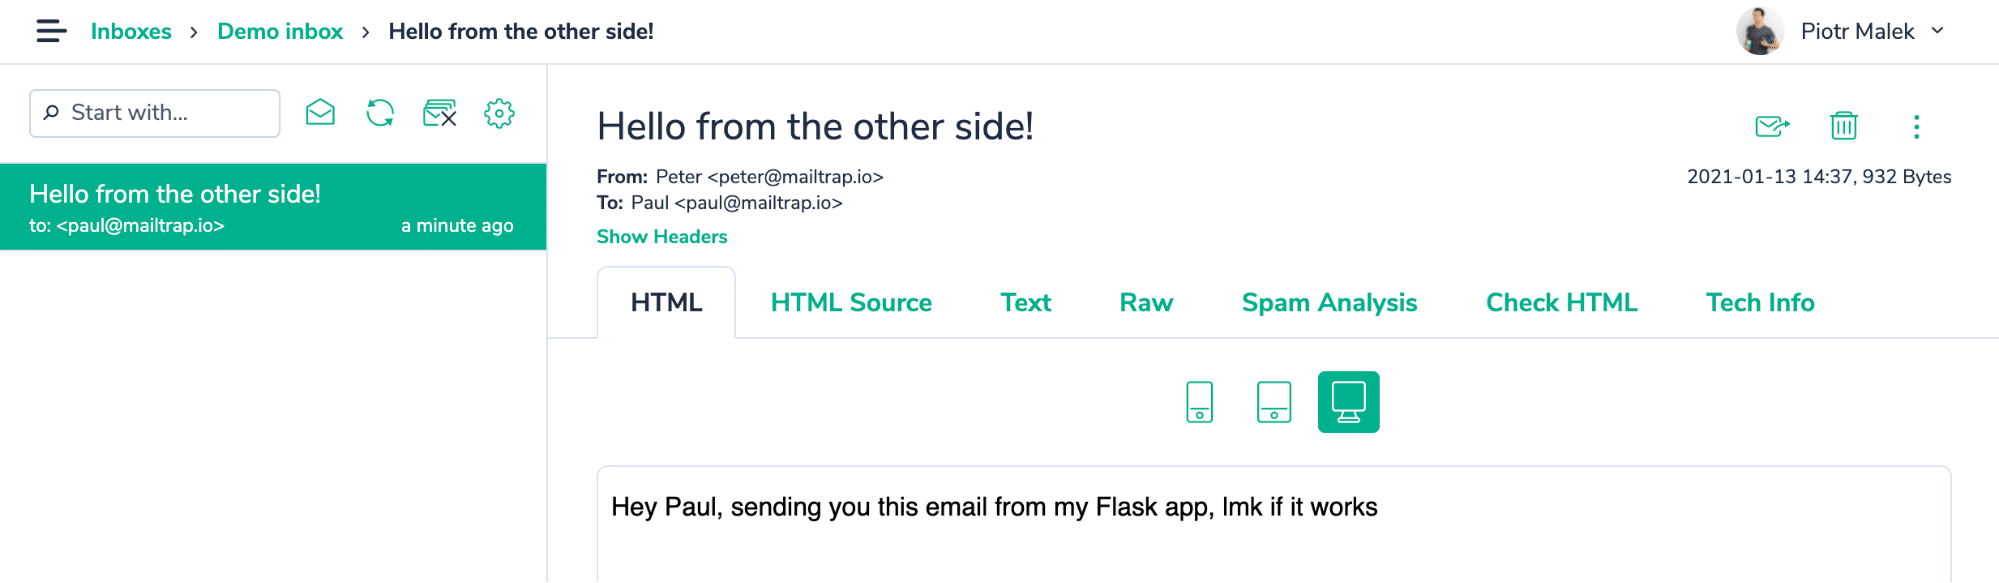
msg = Message('Hello from the other side!', sender = 'peter@mailtrap.io', recipients = ['paul@mailtrap.io'])
msg.body = "Hey Paul, sending you this email from my Flask app, lmk if it works"
mail.send(msg)
return "Message sent!"All in all, the entire code will look like this:
from flask import Flask
from flask_mail import Mail

app = Flask(app_name)

app.config['MAIL_SERVER']='smtp.mailtrap.io'
app.config['MAIL_PORT'] = 2525
app.config['MAIL_USERNAME'] = '97e041d5e367c7'
app.config['MAIL_PASSWORD'] = 'cfaf5b99f8bafb'
app.config['MAIL_USE_TLS'] = True
app.config['MAIL_USE_SSL'] = False
mail = Mail(app)

@app.route("/")
def index():
  msg = Message('Hello from the other side!', sender =   'peter@mailtrap.io', recipients = ['paul@mailtrap.io'])
  msg.body = "Hey Paul, sending you this email from my Flask app, lmk if it works"
  mail.send(msg)
  return "Message sent!"

if __name__ == '__main__':
   app.run(debug = True)
Run it in Python Shell, open http://localhost:5000/, and check whether the email arrived in your inbox. It certainly arrived in ours!
Customizing a bit
MAIL_DEFAULT_SENDER from the configuration is, by default, set to none and we skipped it in our setup. However, if you want to keep sending from the same address, it makes sense to specify it there.
A good idea is to also specify the display name for a sender:
msg = Message('Hello from the other side!', sender = ("Peter from Mailtrap", 'peter@mailtrap.io') You can also specify a HTML version of the message. It can be sent along with a body message or without it.
msg.body = "Hey Paul, sending you this email from my Flask app, lmk if it works"
msg.html = "<b>Hey Paul</b>, sending you this email from my <a href="https://google.com">Flask app</a>, lmk if it works"
You may also add someone in cc and/or bcc, set a reply-to address, add extra headers, and so on. Here’s the full list of parameters available:
flask-mail.Message(subject, recipients, body, html, sender, cc, bcc, reply-to, date, charset, extra_headers, mail_options, rcpt_options)Adding an attachment
Flask-Mail also provides an easy way to attach an attachment to our message. We need to load it with open_resource() method and then use a Python “with” statement to add a file to our email.
with app.open_resource("invoice.pdf") as fp:
msg.attach("invoice.pdf", "application/pdf", fp.read())
Make sure you pick a proper MIME Type for each file and that each is uploaded to the same directory as your script.
Sending bulk messages
Most often, the Flask-Mail example above will be sufficient, but there are situations when you need to send dozens or even hundreds of emails for each request. Think about various cron jobs, for example.
For that, we can use a Python “with” statement. The connection to our email will be kept alive until all emails have been sent (at which point it will close automatically). If you wish to specify the maximum number of emails to be sent, use MAIL_MAX_EMAILS from the configuration (by default, no limit is set).
with mail.connect() as conn:
    for user in users:
        message = '...'
        subject = "Hello from the other side!"
        msg = Message(recipients=[user.email],
                      body=message,
                      subject=subject)

        conn.send(msg)
Other options
Flask-Mail also provides many more options for you to quickly configure an email, add the headers, body, and a number of other parameters. It’s concise and very easy to grasp.
Check the official documentation here to see them all.
Sending emails asynchronously
An important aspect to consider when setting up emails is the possibility of sending them asynchronously.
Let’s look at a typical situation. A user enters your site with the intention of sending you an email. They fill out a form, hit a ‘send’ button, and wait.
In the background, a template is put together and an attempt to reach an ESP (email sending provider) is initiated. Most of the time, it responds within a few milliseconds and sends an email while the user is redirected to some “thank you” page.
The problems pile up if the server isn’t very responsive at the moment and it takes seconds rather than milliseconds to get a response. At times, the connection may even time out. Add to this the fact that multiple users could be attempting to perform this or another request at the same time, effectively clogging up the server. If your app crashes because of that, no emails will be sent either.
Now, this is often a hypothetical scenario. Reputable ESPs earned their reputations because of their reliability. Ping Postmark or Sendgrid and you’ll probably never have to wait more than 100-200ms for a response. Send them dozens of emails at once and they’ll handle them with ease.
As a matter of fact, most, if not all, of the popular ESPs send emails async anyway. It’s because of the underlying verifications each of them runs in the background, in attempts to protect their sender reputation.
None of these things change the fact that your app still connects to an external service every time an email is sent. That’s why you may want to consider adding an async capability to your app.
Celery
Python has an async/await capability available out of the box. It’s a decent solution, but it has its limitations. For that reason, a very common substitute is a package called Celery.
Celery is a tool for distributing work across threads and machines. When an email is sent, a Flask app calls a Celery task that takes the ESP connection process on its shoulders. And your app can quickly respond and display a “thank you” message to a user nearly instantly.
In the background, Celery builds a queue of tasks that will be processed outside of Flask. You can configure it to retry unsuccessful sends at certain intervals or limit the number of requests a user can submit before they need to take a break. All of these things speed up the sending process, protect you from possible timeouts and, ultimately, make for a better user experience.
Sending an email with Celery and Flask-Mail
Let’s start by installing Celery:
pip install celeryNote that Celery is no longer supported on Windows. Try to configure the following environment variable, as suggested in the repository thread:
import os
os.environ.setdefault('FORKED_BY_MULTIPROCESSING', '1')
Celery requires something to store your queue of tasks, and there are multiple available options – you can check them in detail here. A quick one to get you started is having Redis running on your machine. If you are not sure whether you have it installed, you can use it through docker with the following command:
docker run -d -p 6379:6379 redisAnd you will need to install Python’s dependency to use Redis:
pip install redisThen, you need to configure a Celery variable, which will take care of connecting to Redis. It needs to be available on the file where you will define your tasks to run in the background later. For a simple example, you can keep it on the same file we are already using for the Flask routes.
celery = Celery(app.name, broker='redis://localhost:6379/0')Now, with Celery configured, we want to send a very simple email. To simplify, we skipped the earlier configuration – make sure you have it sorted out in this or another file. Also, we included how you could pick a custom recipient from a submitted form.
@app.route('/', methods=['GET', 'POST'])
def index():
    if request.method == 'GET':
        return render_template('index.html', email=session.get('email', ''))
    email = request.form['email']

    email_data = {
        'subject': 'Hello from the other side!',
        'to': email,
        'body': 'Hey Paul, sending you this email from my Flask app, lmk if it works'
    }

    send_async_email.delay(email_data)
    flash('Sending email to {0}'.format(email))

    return redirect(url_for('index'))
We send this email with the send_async_email method, invoked by delay(). As the last step, we need to specify the background task Celery is expected to perform.
@celery.task
def send_async_email(email_data):
    msg = Message(email_data['subject'],
                  sender=app.config['MAIL_DEFAULT_SENDER'],
                  recipients=[email_data['to']])
    msg.body = email_data['body']
    with app.app_context():
        mail.send(msg)
If you make a request now, a task will be put on Celery’s queue to send an email. But there isn’t anything processing this queue yet. You need to run a separate Celery process, which will take care of picking tasks from the queue and processing them. On a separate terminal, run:
celery -A main.celery worker --loglevel=INFOWhere “main” is the name of your Python file, and “celery” is the name of your Celery variable.
Now, check your Mailtrap inbox and see whether an email has arrived. If nothing shows up, check the output of the Celery worker for more details.
Testing emails in Flask
Before deploying any email functionality, you certainly need a way to test whether emails are actually sent without spamming users. You also may want to see some of those emails because chances are there will be a thing or two to improve.
The first part can be easily handled with simple Flask settings that will block sending. It can be done in two ways, with the identical outcome:
- Set MAIL_SUPPRESS_SEND from the earlier configuration to False, or
- Add a new setting to the configuration file – TESTING – and set it to True.
Then, you can use the record_messages method to see what’s being sent from your Flask app (make sure you have blinker package installed). You’ll see the list of Message instances under outbox.
with mail.record_messages() as outbox:

    mail.send_message(subject='testing',
                      body='test',
                      recipients=emails)

    assert len(outbox) == 1
    assert outbox[0].subject == "testing"
If, however, you wish to see the emails that your app sends, you’ll need a different solution. Earlier in the text, we showed that Mailtrap can be easily plugged into a Flask app. It works as a fake SMTP, intercepting your outgoing emails and putting them into virtual inboxes.
Each email is visible in your Mailtrap dashboard. You can preview how it will look like on different screens. You may validate the headers and check the support for its HTML/CSS.
Among other features, there’s a spam score, blacklists, bcc tracking, email forwarding, and multiple inboxes. It’s certainly a more comfortable method of testing than the one above, and you get to test a lot more than just sending.

Other considerations
As we mentioned earlier, Flask-Mail isn’t the only method for sending emails in Flask – Python’s smtplib is also available. We didn’t cover it in this article because Flask-Mail is much more powerful and, in all honesty, there’s no reason not to use it.
If, however, you want to explore this option of sending emails, be sure to check out our Python tutorial. Some other interesting reads could include Sending emails with Django and Python email validation.
Thanks for your time and we’ll see you around!